
Youth basketball drills
Basketball shooting drills for youth coaches
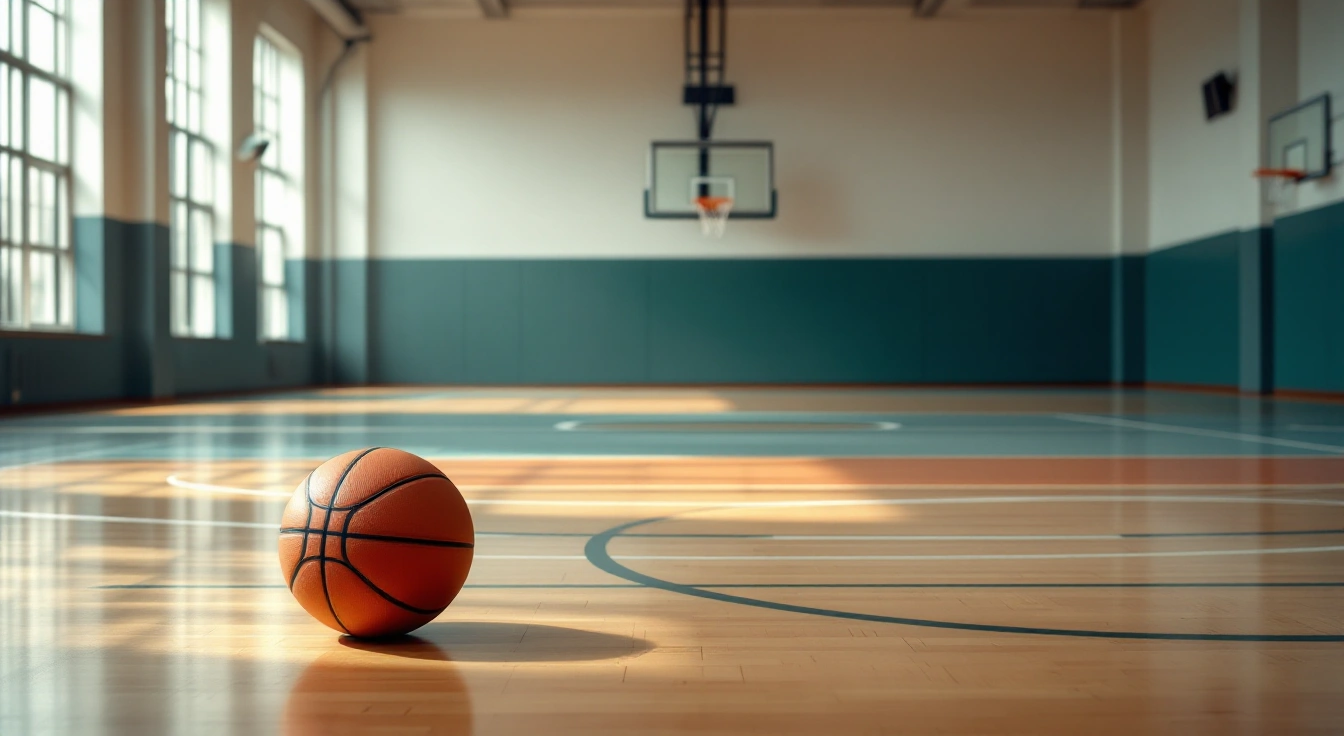
Basketball shooting drills need a clear shot, collection route and waiting position. Use a close controlled attempt before adding a catch or a moving finish. The drill should reveal one teaching task rather than hide it inside a long line of rushed shots.
Start with a still close shot, then a catch-and-balance attempt and a finish from either side. A final shoot-or-pass task adds one passive defender. Use a suitable ball and basket under the program’s rules. These are authored practice examples; a made shot is not the only observation, and the times below are editable rather than prescribed workloads.
USA Basketball’s foundational shooting lesson addresses the shooting action. These drills add the feed and a defender only after the close attempt stays controlled.
On this page
Group and equipment checks
Work with adult-supervised small groups. Players need to follow the stop cue and stay outside another shooter’s landing space. At one basket, one active shot at a time keeps the collection route clear. Use no-hoop receiving work for a second group rather than send two unrelated balls at the same rim.
Close-range form drill
- Goal: Repeat a calm starting position and release.
- Readiness: Can hold the ball and see a reachable target.
- Players: Shooter and collector, then swap.
- Space: One close spot and a side collection lane.
- Equipment: One suitable ball and basket.
- Editable example time: 3 minutes, short turns.
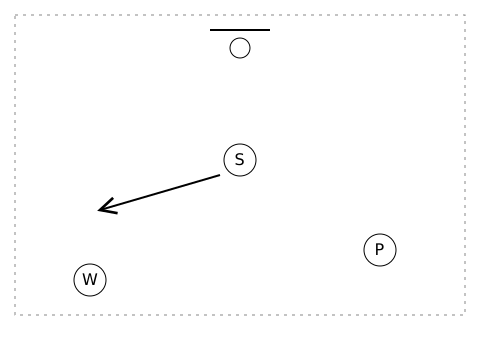
S makes a close attempt while P collects from outside the landing area and W waits clear. The solid arrow is S’s exit after landing. Use one guide-hand observation per short turn.
Solid arrows show player movement; dashed arrows show the ball. The dotted edge marks an illustrative work area, not regulation boundaries.
Step 1: S starts close enough to reach with a gentle motion. The collector waits outside the lane. S looks at the target, makes one attempt and remains clear while the ball comes down.
Step 2: The collector returns the ball only after the space is calm. The adult watches the guide hand for one turn, then changes the observation only after explaining the new cue.
Coach cue: Let the side hand stay quiet at release.
Easier version: Use a still target pass instead of a shot.
Harder version: Add a small self-set before the same close attempt.
Observe: The starting position and landing stay controlled, including on misses.
Catch, balance and shoot
- Goal: Prepare the feet after receiving.
- Readiness: Can catch without chasing the ball.
- Players: Three rotating as passer, shooter and waiter.
- Space: A close shot spot, feed lane and exit.
- Equipment: One ball and a basket.
- Editable example time: 4 minutes, rotate after each attempt.
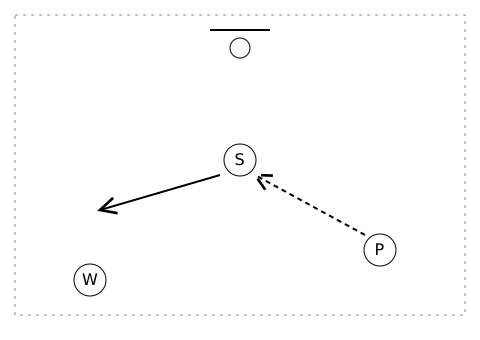
P gives S the dashed feed. S catches, pauses and shoots before leaving by the solid side exit. W stays outside feed and return routes; a feed that causes a lunge is repeated.
Solid arrows show player movement; dashed arrows show the ball. The dotted edge marks an illustrative work area, not regulation boundaries.
Step 1: P sends a gentle pass to S. S catches and pauses before the shot. The waiting player stays outside both feed and rebound routes. End each turn after the shooter clears the basket area.
Step 2: Remove the pause only when catches remain balanced. If the feed forces a lunge, fix the pass first. Later feed from the other side while keeping the distance the same.
Coach cue: Control the catch before the lift.
Easier version: Have S begin holding the ball.
Harder version: Vary the feed angle with no defender.
Observe: The catch does not become a rushed step into traffic.
Finish on either side
- Goal: Recognize a close finishing route on each side.
- Readiness: Understands the chosen basic layup footwork.
- Players: Two or three with one active shooter.
- Space: Separate side approach and return.
- Equipment: One ball and suitable basket.
- Editable example time: 4 minutes, alternate sides calmly.
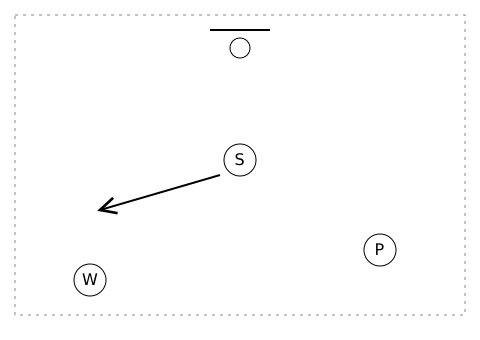
S uses one close finishing side at a time while P collects and W waits. The solid arrow clears the landing area. Mirror the setup for the other side only after the ball is controlled.
Solid arrows show player movement; dashed arrows show the ball. The dotted edge marks an illustrative work area, not regulation boundaries.
Step 1: Use a close right-side finish, then mirror to the left. Begin without a running approach. The next player waits until the shooter lands and clears, not merely until the ball leaves the hand.
Step 2: Add a slow final step if the still version is settled. The less familiar side can use a closer spot. Do not let one player’s pace decide the whole group’s starting distance.
Coach cue: Finish with space to land.
Easier version: Keep both feet down for a close release.
Harder version: Add a short accurate pass before the finish.
Observe: Each side has a controlled takeoff and a clear exit.
Shoot-or-pass game
- Goal: Notice when the shot window is closed.
- Readiness: Can receive and make a short pass.
- Players: Shooter, outlet, passive defender and adult feeder.
- Space: One half-court end with separate outlet space.
- Equipment: One ball and a basket.
- Editable example time: 4 minutes, stop on the chosen action.
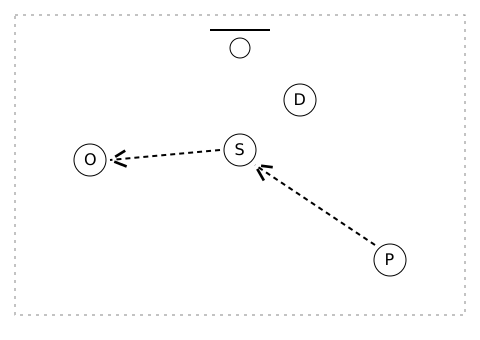
P feeds S while D leaves or closes the shot view with a gap. O is the visible outlet on a separate angle. The second dashed route is S’s passing option when the close shot is covered.
Solid arrows show player movement; dashed arrows show the ball. The dotted edge marks an illustrative work area, not regulation boundaries.
Step 1: The feeder sends to S while the passive defender either stays back or closes the shot view at walking pace with a gap. S chooses a controlled close shot or a pass to the visible outlet.
Step 2: End after the attempt or outlet catch. Rotate all jobs. Keep the defender’s choices clear before making them less predictable; a covered shot need not be taken to complete the turn.
Coach cue: See the window before the shot.
Easier version: Tell S the defender’s choice in advance.
Harder version: Let the defender choose hold or approach.
Observe: The shooter sees a pass as a valid answer, not a failure to shoot.
Put these activities into a practice
Observe attempts under the same stated conditions. If you move the spot or change the basket, say so before comparing the action. Keep only anonymous group observations.
For a short session, use the still task and one receiving task, with water and transitions inside the full practice total. More shots are not automatically better if the route becomes crowded or the movement turns into a heave.
FAQ
Should distance increase after one made shot?
Not by itself. Look for the task the group was practicing, such as a calm catch or quiet guide hand. One make does not establish a repeatable movement. Keep the same spot long enough to observe control, and shorten the distance if it forces the player to throw with strain.
Choose the next coaching task
Youth Basketball Tips · https://youth-basketball-tips.com/youth-basketball-drills/basketball-shooting-drills/